
Easter is coming, and I decided to do a sand casting giveaway! Read to the end to see the entry instructions!
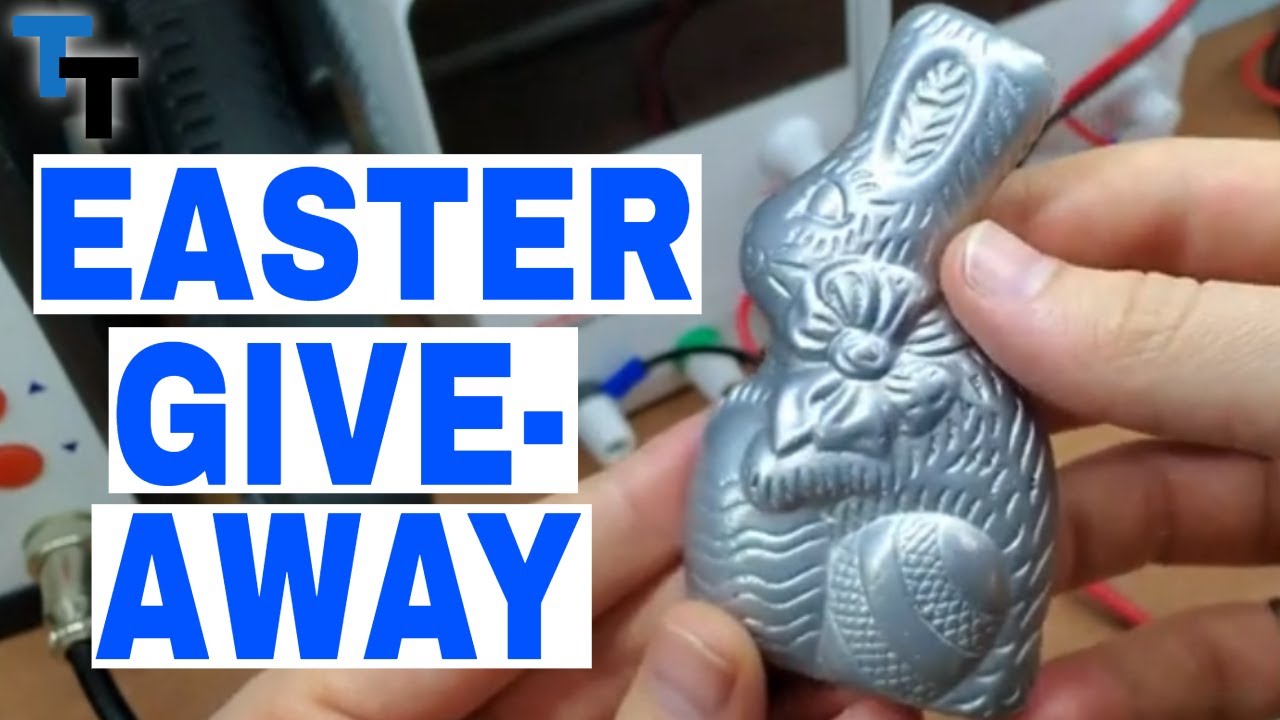
I went to the Dollar store and found some chocolate bunnies. Since they look like they were cast, the design should work well for sand casting. I built a bigger sand casting flask and I can’t wait to try this!
Materials:
4″ Solid Chocolate Easter Bunny: Dollar Tree
Silicone: Amazon
Plaster of Paris: ACE Hardware
Casting Sand (120 mesh): Amazon
Try 1: Chocolate Sand Casting Pattern
I followed the same steps as my sand casting video. Instead of the plaster patterns, I use the chocolate bunny. Oops, it looks like the sand attached to the chocolate and this didn’t work out as I had hoped.
Try 2: Painted Chocolate Sand Casting Pattern
Now I will try something different. I paint it with some regular primer. After it’s dry, I use it as the pattern.
It looks like the paint covered a lot of the details on the pattern. That’s not what I want, let’s try again.
Try 3: Silicone Mold with Far Too Many Bubbles
Since my two last Tries didn’t work, I decided to make a plaster bunny. For that, I mix some two part silicone, vacuum it to remove the bubbles and add the bunny. After it has cured, I cover it with more silicone and wait until it’s completely cured again to cut the silicone to reveal the mold cavity.
Okay, so this is not going to make a good bunny. We probably didn’t let the vacuum work for enough time. There were too many bubbles in the mould. Let’s let the vacuum pump work a little longer.
Try 4: Silicone Mold With Fewer Bubbles
I use the same two part silicone, but this time I let in the vacuum work for about 5 minutes.
It looks pretty good. I add some plaster inside and let it cure. Now that I have a plaster pattern, I can cast it on the sand box.
The details are better but there’s a lot of porosity because I missed my basin and poured the metal directly into the sprue. I can do better.
Try 5: Plaster Sand Casting Pattern Done Right
Instead of making a horizontal silicone mould, I will do it vertically. The bubbles should float away from the bunny and not affect the result. Now that’s a great plaster pattern! I follow the same steps as the last try and wow, there’s way less porosity! Now it’s time to polish it!
Polishing
I bought a buffing wheel and brown buffing compound at harbor freight. We had an issue mounting the buffing wheel, so we used a little tape to center it. I ground down some of the edges and used the buffing wheel. The burrs on the part, tore apart the buffing wheel and the speed was probably too fast, but it resulted in this rustic looking bunny.
We’ll call this Try 1 of polishing aluminum. The rest of it is going to be in another Project!
Giveaway
I will be giving away 3 of these bunnies. To participate, comment below. I will randomly select and announce three winners on Easter Monday, April 5th, 2021. One of the lucky winners will also receive a Ten Tries Lost PLA project kit (Available for US residents 18 or older, only. No purchase necessary). Thank you for your support and I hope to see you soon!
For a beginner’s guide to sand casting, check out the first sand casting project!
That’s pretty cool. I used some chocolate last year to do some casting. I’ve been trying silicone molds with resin. Never thought about using plaster. I bet it hardens faster and cost less too. Thanks for sharing.
Thank you! Not sure how fast resin cures, but the plaster can come out of the silicone after 1 hour. I think it needs a full day to reach max strength, and I’d say it costs a lot less. I was trying to work out the kinks, but the plaster kept breaking. When you do it, be sure to make some extras!